Ideal soil and weather conditions for groundnut crop-
Soil type for groundnut-
Groundnut is raised in a sandy loam as well as well drained sandy clay loam soil. Deep well- drained soil with pH of 6.5 -7 as well as having great fertility are perfect for groundnut cultivation. Spanish as well as Runner varieties are beneficial for good quality soil compared to the Virginia forms. The lack of pods is often rich in heavier grounds. An excellent climatic condition for better germination of groundnut is 31° C. Heavy and stiff clays are unsuitable for groundnut cultivation as the pod development is hampered in these soils.
Loam soil-

Loam soil is a mixture of sand, silt and clay that are combined to avoid the negative effects of each type.
These soils are fertile, easy to work with and provide good drainage. Depending on their predominant composition they can be either sandy or clay loam.
As the soils are a perfect balance of soil particles, they are considered to be a gardeners best friend, but still benefit from topping up with additional organic matter.
Climate
The crop can be grown successfully in places receiving a minimum rainfall of 600mm and a maximum rainfall of 1,200mm. The rainfall should be distributed well during the flowering and pegging of the crop. The groundnut cannot stand frost, long and severe drought or water stagnation. The favorable temperature range for growing peanut is 21-270C during the crop growth period.
Temperature below 180C and higher than 350C will reduce germination and flower initiation.
Week before planting
Land preparation
After harvesting of previous crop, plough the land twice and pulverised soil to obtained good tilth of soil. Give a third ploughing if necessary for rainfed crop, in the end of June or early July. Use harrow or tillers for cultivation purpose. When land is heavily infested with perennial weeds, very deep ploughing is needed. For irrigated crop, make beds of convenient size depending upon topography. Application of 5-7 ton/acre of chicken manure or 10 ton/acre of farm yard manure or well decomposed cow dung should be done before sowing. It helps to improve soil structure along with good plant growth.
Disc Plough

The disc plough bears little resemblance to the common mould board plough. A large, revolving, concave steel disc replaces the share and the mould board. The disc turns the furrow slice to one side with a scooping action. The usual size of the disc is 60 cm in diameter and this turns a 35 to 30 cm furrow slice. The disc plough is more suitable for land in which there is much fibrous growth of weeds as the disc cuts and incorporates the weeds. The disc plough works well in soils free from stones. No harrowing is necessary to break the clods of the upturned soil as in a mould board plough.
Tractor Drawn Cultivator:

Cultivator is an implement used for finer operations like breaking clods and working the soil to a fine tilth in the preparation of seedbed. Cultivator is also known as tiller or tooth harrow. It is used to further loosen the previously ploughed land before sowing. It is also used to destroy weeds that germinate after ploughing. Cultivator has two rows of tynes attached to its frame in staggered form. The main object of providing two rows and staggering the position of tynes is to provide clearance between tynes so that clods and plant residues can freely pass through without blocking. Provision is also made in the frame by drilling holes so that tynes can be set close or apart as desirect. The number of tynes ranges from 7 to 13. The shares of the tynes can be replaced when they are worn out.
Advantages of soil preparation-
- It loosens the soil.
- It aerates the soil.
- It prevents soil erosion.
- It allows easy penetration of roots into the soil.
Disadvantages of soil preparation-
The downside of tilling is that it destroys the natural soil structure, which makes soil more prone to compaction. By exposing a greater surface area to air and sunlight, tilling reduces soil’s moisture-retaining ability and causes a hard crust to form on the soil surface.
- For irrigated land, prepare ridges and furrows separated by the appropriate distance.
- Divide the field into smaller plots at your convenience to facilitate the irrigation.
Planting systems for groundnuts-
There are several ways to sow peanuts: sowing on a flat surface or using a ridge-and-furrow system, or a broad bed-and-furrow system. The broad bed-and-furrow system has multiple benefits over the other two systems:
- Better control of soil moisture and good drainage for excess water.
- Better control of weeds through intercultural operations.
- Less compaction of soil facilitates rooting.
- Adapted for plastic mulching.
- Easier mechanical harvesting.
How to prepare a broad bed and furrow system:
- Prepare beds of 1.2m wide and 15-20 cm high.
- Beds should be spaced 30 cm apart.
- In the kharif season, beds should be formed in the same direction as the slope (parallel).
- In the rabi season, beds should be formed in the opposite direction of the slope (perpendicular).
Using mulch in groundnut production-
Both polythene mulch and organic mulching in groundnut have been proven to improve production.
- Polythene mulching has been found to be effective in increasing the yield, seed oil content, protein content and level of eight other compounds in the seed.
- When grow under polythene mulch system, groundnut is sown approximately 10 days earlier and it matures about 10 days earlier than under non-mulched condition.
- Polythene mulching increases the soil temperature and therefore shortens the crop period.
- During the hot season, it also protects the soil from direct sunlight.
- It also helps by retaining soil moisture, improving soil texture and in controlling weeds.
- A polythene film of a thickness of 0.007 mm is optimum and more economical.
- Additionally, rice straw applied as mulch was also found to be effective for improving the productivity of groundnut.
Seed Treatment–

Use healthy and well developed kernels for sowing. Discard very small, shrivelled and diseased kernels. Carry out seed treatment with Thiram @ 5gm or Captan @ 2-3 gm/kg or Mancozeb @ 4g/kg or Carboxin or Carbendazim @ 2gm/kg of the kernels to avoid infestation from ground borne disease. After chemical treatment, treat the seeds with Trichoderma viride @ 4g/kg seed or Pseudomonas fluorescens @10gm/kg seed. Seed treatment will protect the young seedlings from root-rot and collar rot infection.
| Fungicide/Insecticide name | Quantity (Dosage per kg seed) |
| Carbendazim | 2gm |
| Captan | 2-3gm |
| Thiram | 5gm |
| Mancozeb | 4gm |
| Chlorpyriphos 20EC | 12.5ml |
Rhizobium seed treatment-
If you are cultivating a leguminous crop for the first time, treat seeds with Rhizobium bacteria to improve the absorption of nitrogen during rainy season and increase yields at harvest. The application of Rhizobium may save you 20 to 25 % of the required nitrogen during the season. Check the expiration date on the packet when acquiring powders and make sure to carry out the procedure explained below for successful inoculation of your seeds.
- Prepare a 10% sugary solution to stick the Rhizobium bacteria to the seed surface. This solution is made by mixing 50 g sugar or gur to 500 ml of water.
- Dissolve the sugary solution by warming for about 15 minutes and then make sure to cool it down to room temperatures.
- Empty and dissolve the ready-made Rhizobium culture into the cooled sugar solution (200-400 g of powder/acre). Mix thoroughly so as to obtain uniform slurry.
- Pour slurry over the seeds in a container and make sure to mix thoroughly while doing so. Keep on mixing till all seeds are evenly covered.
- Spread the treated seeds over gunny bag/paper cloth or even cement/solid surface for drying in the shade. Do not expose the inoculated seeds to high temperature, dry wind and hot sun.
- After the seeds are dry, collect them in bags and prepare for sowing.vif inoculated seed cannot be sown on the same day of inoculation, repeat treatment again before sowing.
First to second week-
Method of sowing–
Seeds are sown with help of seed drill or a dibbler.
Seeds Rate-
For sowing, use seed rate of 38-40 kg/acre.
Sowing Depth-

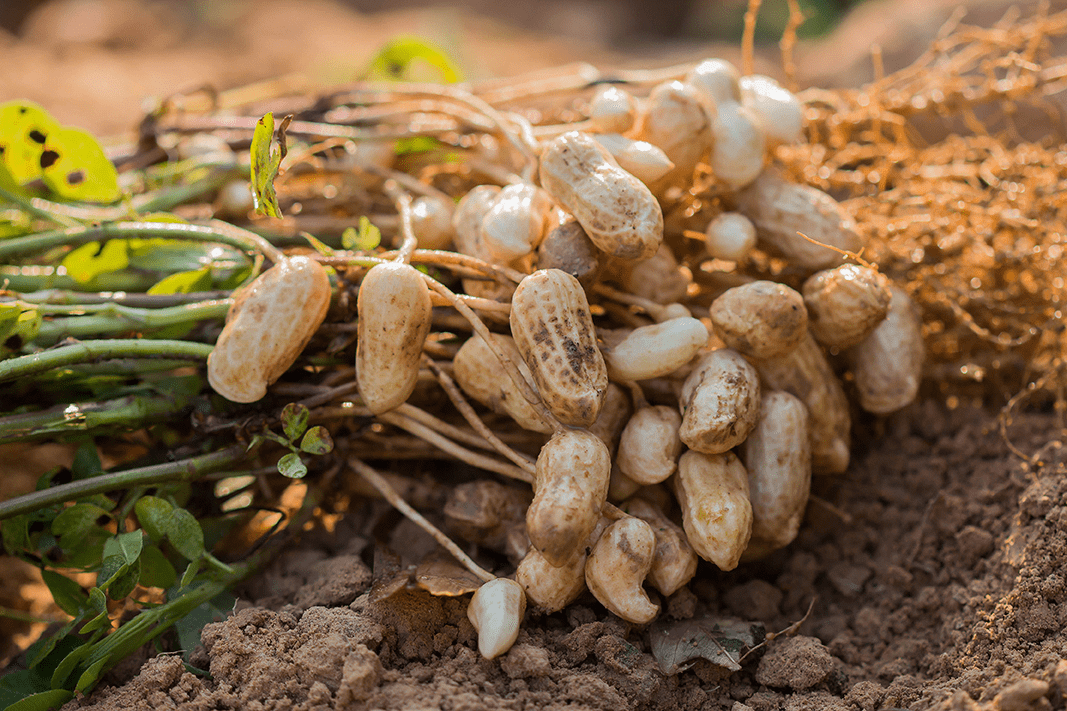
Healthy and well developed pods should be hand shelled with a suitable groundnut sheer about fortnight before sowing. Pods are sown with help of seed drill at depth of 8-10 cm at a seed rate of 38-40 kg/acre.
Spacing

Spacing to be adopted is depends upon type of variety. i.e., for semi spreading variety (M 522) use spacing of 30cm between the rows and 22.5 cm between plants and for bunchy type varieties (SG-99, SG84) use spacing of 30 x 15 cm.
Irrigation the groundnut crop-
Water supply is particularly important during three stages of crop growth: germination, flowering stage and pod/seed development. Here are some recommendations on how to prepare an irrigation plan so that your plants are vigorous and healthy. Remember that the exact quantity applied will depend on the type of soil, variety and weather.
- The initial irrigation after sowing must be substantial in order to favor seed-soil contact and the moisture of the seeds.
- Irrigation can be planed 3-5 days after that, depending on soil moisture and water availability.
- If there is no rain, fields should be irrigated regularly (every 7-15 days) during the vegetative stage.
- The last irrigation event should be during pod development to secure yields.
- Under no circumstances should you overwater, as leguminous crops are very sensitive to flooding.
Note- When 80% of pods are dry, plants should be left to dry for about 20-25 days before harvesting.
Monitor your field for some disease and insect/pest incidences-
Termites: Odontotermes spp

Symptoms of damage:
- Wilting of plants in patches
- Termites penetrate and hollow out the tap root and stem thus kill the plant.
- Bore holes into pods and damage the seed.
- It removes the soft corky tissue from between the veins of pods causing scarification, weaken the shells, make them liable to entry and growth of Aspergillus flavus that produces aflotoxins
Identification of the pest:
- The termites are endemic in red and sandy soils.
- These are social insects, live in termataria, in distinct castes, workers, king and queen.
- Workers’ are small (4 mm) and have a soft, white body and a brown head
Management:
- Digging the termataria and destruction of the queen is most important in termite management
- Use well rotten organic manure
- Harvest the groundnut as soon as they are matured, early removal of the produce from the field will reduce the chances of termite damage to pods
- Apply chlorpyriphos 20 EC to control termites
- Dust chlorpyriphos @ 30-40 kg/ha in soil before sowing in endemic areas
- Seed treatment with chlorpyriphos @ 6.5ml /kg of seed may reduce termite damage.
Groundnut leaf miner: Aproaerema modicella


Symptoms of damage:
- Young larvae initially mine into the leaflets, feed on the mesophyll and form small brown blotches on the leaf
- Later stages larvae web the leaflets together and feed on them, remaining within the folds
- Severely attacked field looks “burnt” from a distance
Identification of the pest:
- Eggs: Shiny white and are laid singly on the underside of the leaflets.
- Larvae: Green in colour with dark head and prothroax
- Adult: Brownish grey moth, 6 mm long with 10 mm wing span. Forewings with white spot on the costal margin
Management:
ETL: 1 larvae/meter row
- Set up light traps @12/ha
- Apply anyone of the following insecticides
- Dimethiate 30 EC 660 ml/ha
- Malathion 50 EC 1.25 l/ha
- Methyl demeton 25% EC 1000 ml/ha.
Leave a Reply